135compact.com 110 cartridge ultra compact cameras How to replace a Kodak K or 7R31 type K battery (Eveready 538)
The
Kodak 110 film cameras, launched in 1972 came for an important part
with a new battery size, the Kodak K or 7R31 type K battery. Other
manufacturers followed and some of them adopted also the battery size.
These batteries are no longer made and no longer available, even old
stock is no solution any more. So these cameras have become useless. As
110 film is produced anew, this is a pity.
So how to replace a
Kodak K or 7R31 type K battery? There are tutorials on the net which
propose an external battery case. I found an easier solution, however
it needs an old (even defective) battery, which you will find for next
to nothing with old Kodak 110 cameras. The battery is also referred to
as 7K31, Eveready 538 or RPX 31, it's 4.5 volt, also given as 4 volt.
Sometimes you read that it's 4LR53, but I think this is wrong. 4LR53 is
a bigger diameter and it's 4 cells, not 3.
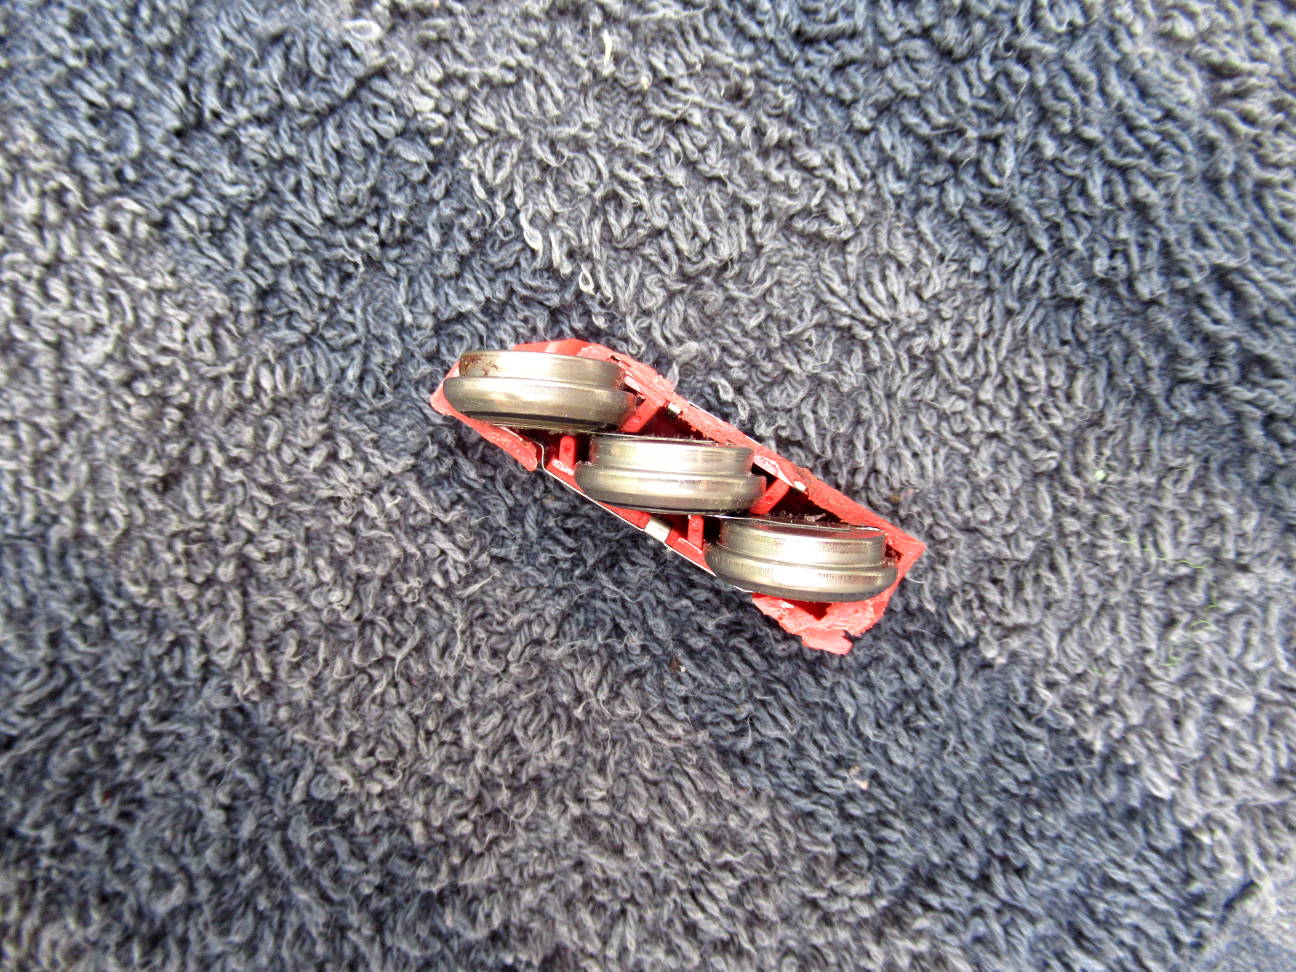
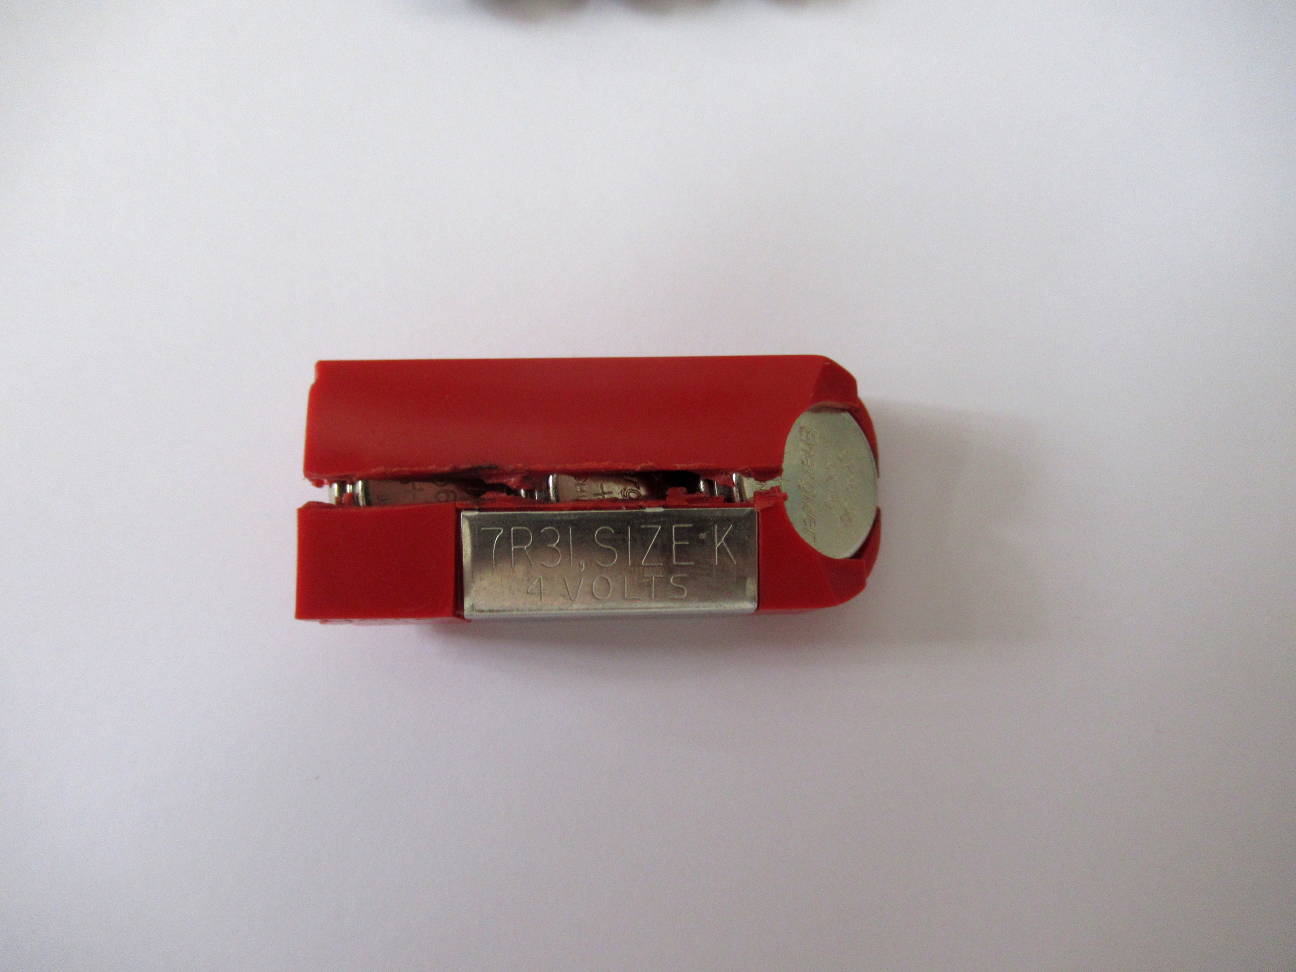
This is what it looks like: A Kodak K battery,
marketed under 7R31 type K, 7K31, Eveready Energizer 538 and RPX31. It has
4.5 volt.
You
will need a Dremel or a similar tool, three V625U button cells, also
named LR09, easily available, a middle sized screwdriver and 2 tiny
sheets of metal, 15x4mm size. Disclaimer: do not try to do this unless
you have basic DIY skills and if you understand what you do. You should
understand basic electrics and short circuits.
You have to cut the case open. Cut cautiously, do not cut into the battery cells and cut all round the case.
Take a middle sized flat screwdriver, insert it into the freshly cut slit and break the case open.
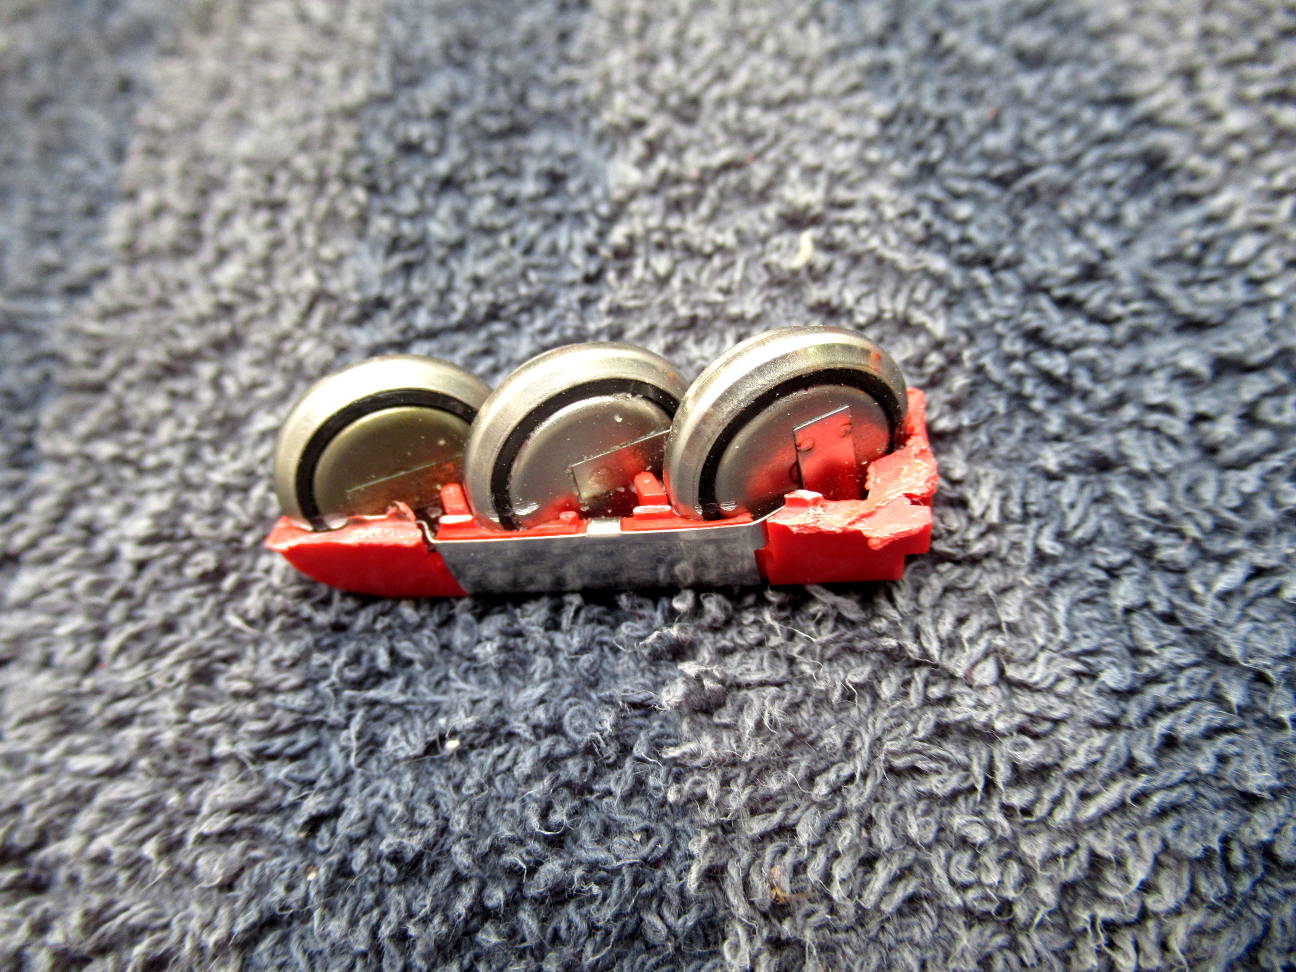
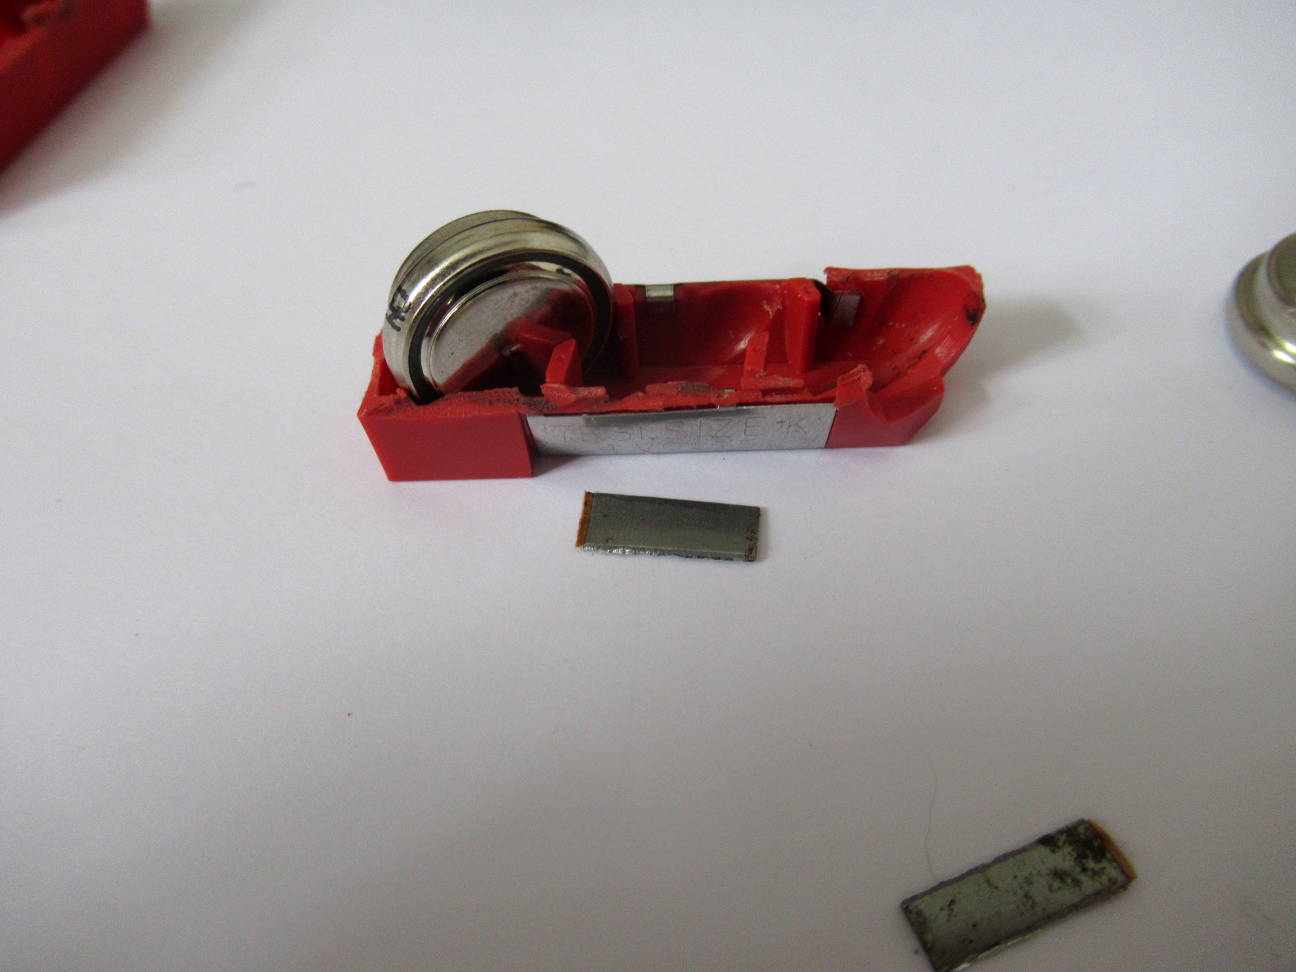
The case open. It's 3 button cells soldered together inside.
Seen from above.
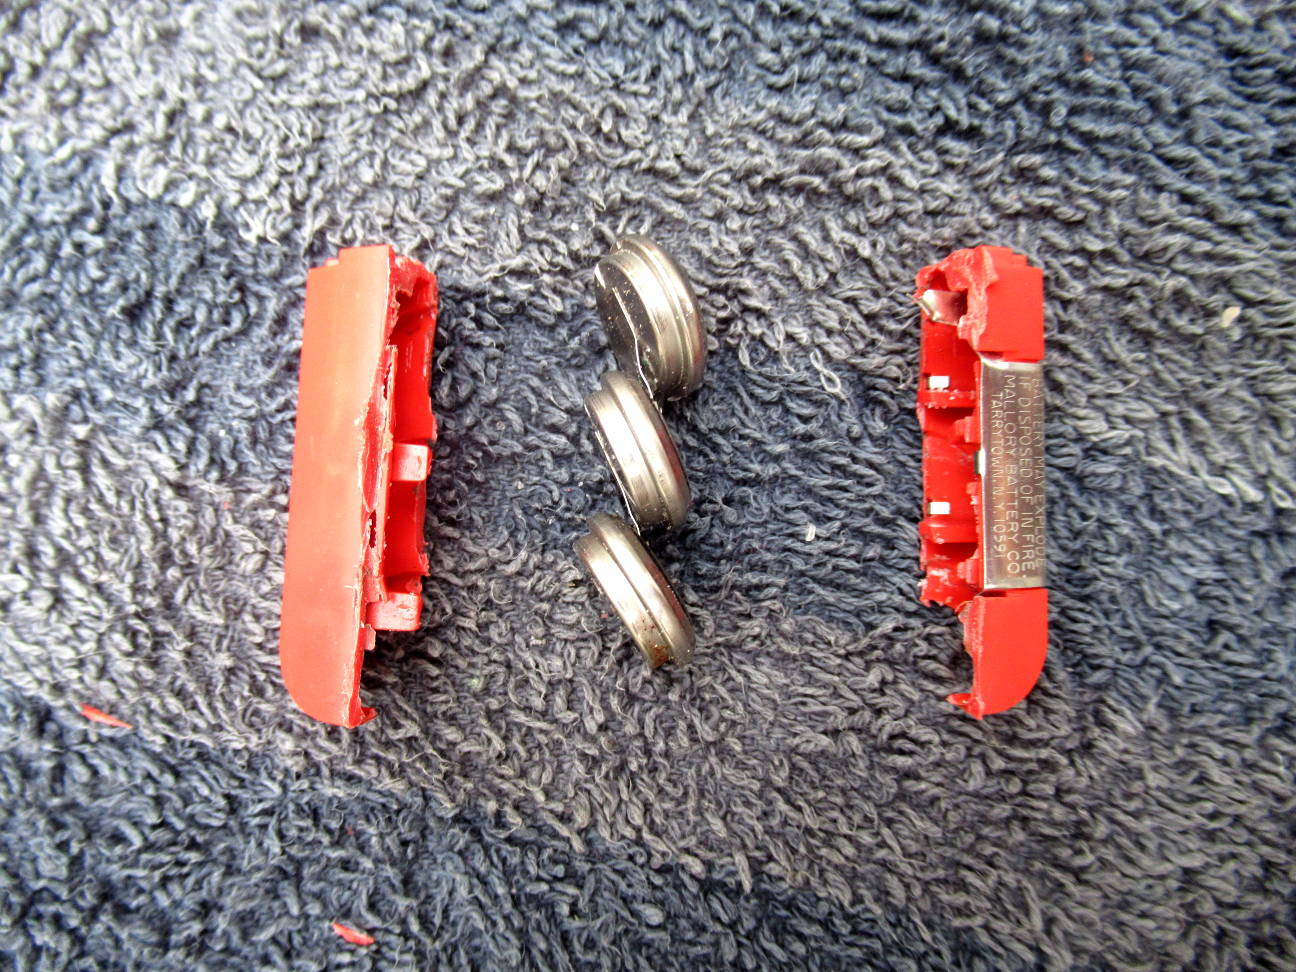
One side...
...and
the other. The soldering of the 3rd cell (to the right) has to be pryed
off. Insert a knife under the soldering lug and pry, it will come off.
All disassembly done.
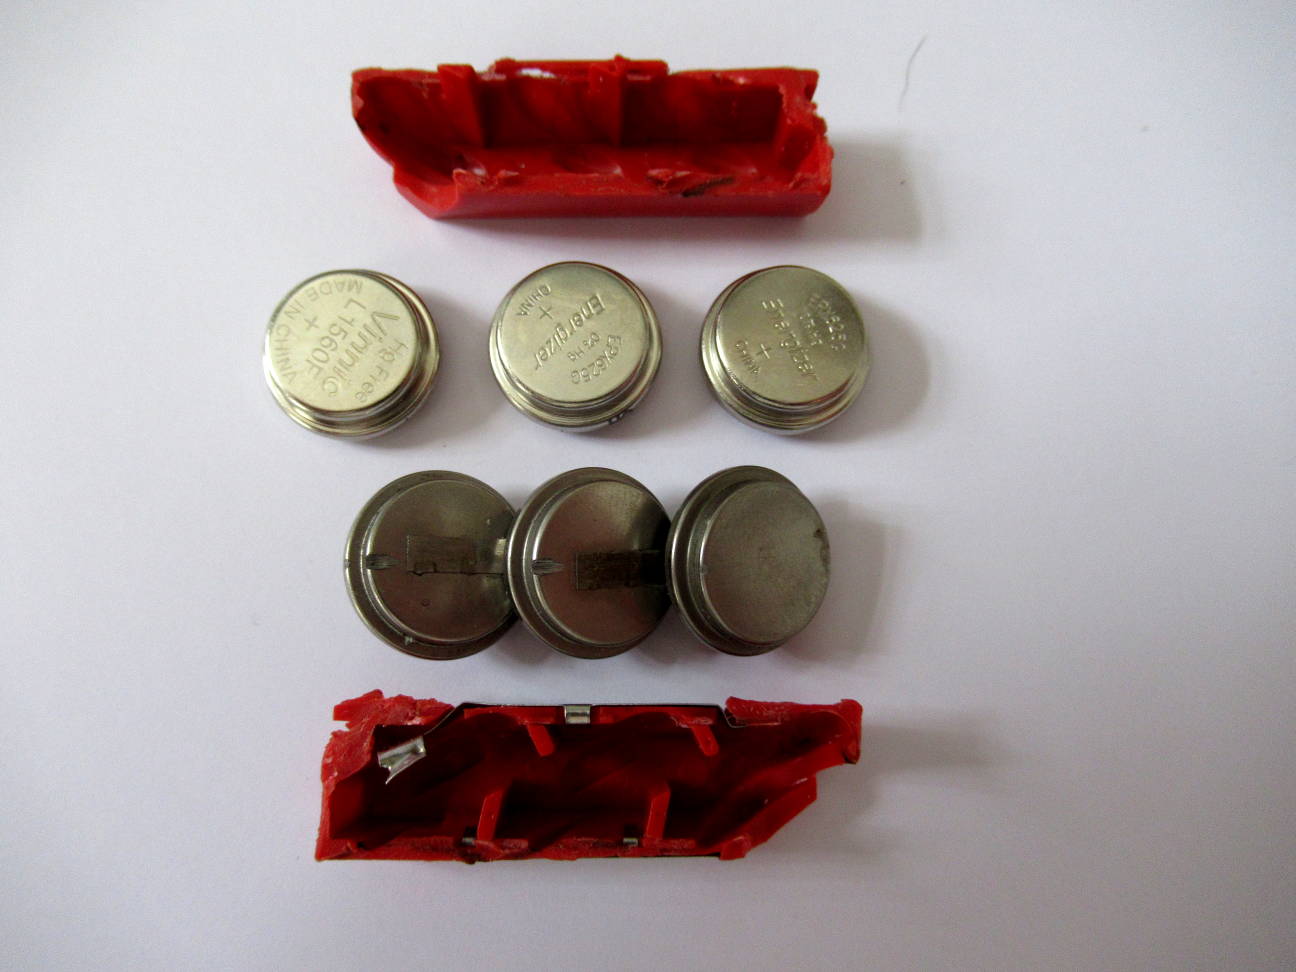
Assembly cells, 3 different V625U cells and the old parts.
The
new cells put into the old case. They are nearly the same diameter, but
about 0.5mm thicker than the old ones, so you have to force a bit.
The new cells fit. They still have to be connected to each other.
The 3rd cell in place. A small piece of metal, ca 15x4mm, to be inserted between 2 cells.
Connection
in place, I bent it a little bit to ensure a good connection to the
next cell. Don't make it too long, it would touch the negative pole of
the housing.
Ready
for the 1st cell. For the connection of the 3rd cell to the negative
pole I just bent the old soldering lug against the cell.
Assembly
done, voltage test. If you want a bomb proof solution, solder the cells
instead of just bending the connections. But it works well without
soldering.
The
cell assembly put into the camera. No need to tape the two parts of the
case together, they are held together on their own, once inserted.
So here you are with a fresh battery. Enjoy your camera!